Portfolios
The Portfolio page displays items that are created under “Copper Penny Portfolio” in the admin.
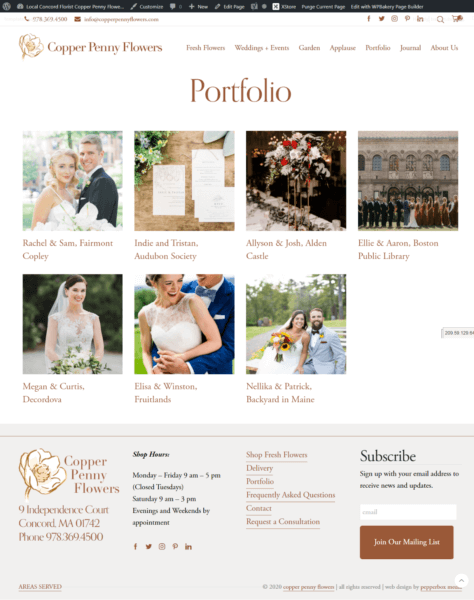
There can be multiple types or categories of portfolio items. Initially, we are only using the Wedding type, and those are the items that are displayed on the main public Portfolio page. We may have other portfolio pages down the road, for Garden, Micro Weddings, etc., and when we do, those items should be assigned to those types. In addition, there are some portfolios that do not have a type. Those will not be included on a public portfolio page, but might be linked to directly from other pages, such as the Applause page.
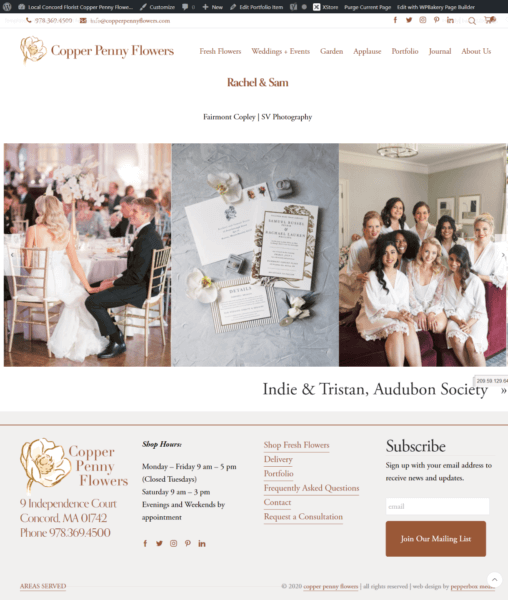
Portfolio items include a specific set of information: a title, optional location, photographer, and season fields, an optional description, a featured image, and a set of “carousel images” that will be displayed in the strip when viewing the portfolio item.
To create a new portfolio item, you select “Copper Penny Portfolio, Add new” from the admin sidebar, or “New, Portfolio item” from the admin toolbar at the top of the window. After clicking the “Backend Editor” button below the title, you should see the following:
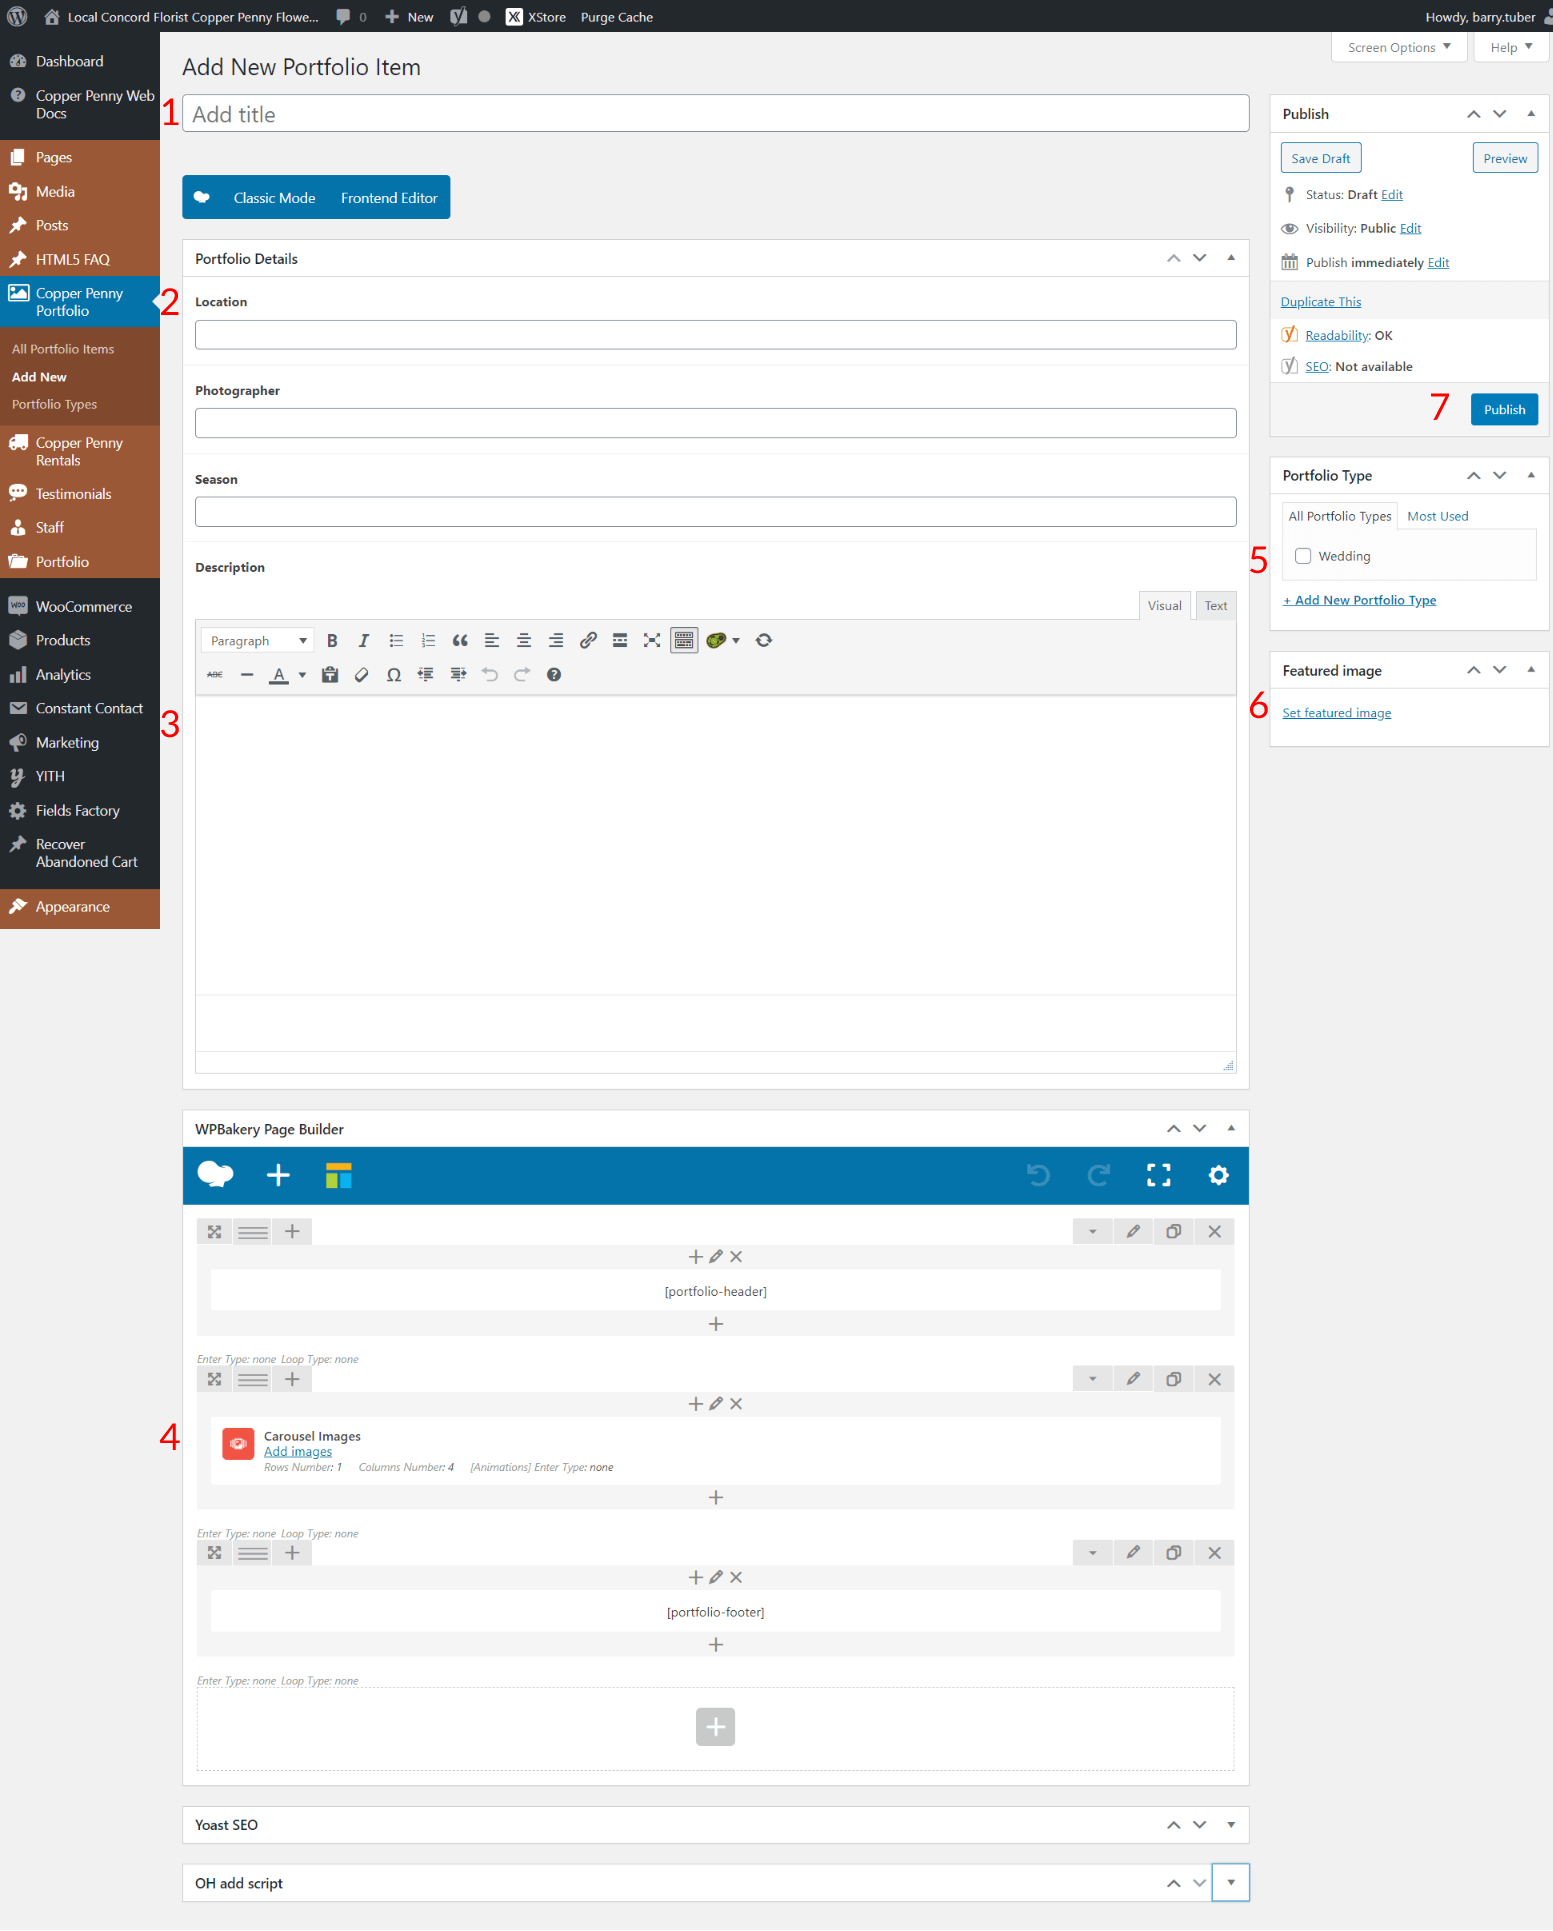
Fill in the following:
- Title: this will be displayed on the portfolio page, and at the top of the portfolio items when viewing that. For weddings, we are using first names of the couple, so that should be entered as “Jill & Joe” for example.
- Enter the location, photographer and season, if available. Those will be displayed at the top of the portfolio item. The location (or venue) will also be displayed with the item on the portfolio page.
- Description: any summary copy about the item should be entered, and will be displayed below the photo strip on the portfolio item.
- Photos: Click the “Add images” link under “Carousel Images”. A window entitled “Carousel Images Settings” will pop up. Click on the + sign in the grey square box under “Images”. You will be show the Media Library, and when there, click the “Upload files” tab and then either drag your photos into the window or click the “Select Files” button to select them from your computer. When all of the photos have finished uploading and processing, click the “Add Images” button on the lower right, and the images will be added to the portfolio item. You do not need to do any cropping or resizing of the images; all of them will automatically be displayed in the strip with the same height.
- Select the “Portfolio Type” for the item, if it will be going on a portfolio page.
- Set the featured image, which will usually be one of the images you uploaded to the carousel. When you click the “Set Featured Image” link, you will be returned to the Media Library where you can click on or upload the photo you want.
- To save and finalize your new item, click the “Publish” button. If you have published it already at some point in the process, the button will say “Update”, and you should click it to save your changes.
If the item is assigned a Portfolio Type, it should now be visible on its portfolio page. You can control the order of the items on the page according to this help document.